
Working on Objet Portrait: Drip Drop (2)
- Oct 24, 2017
- 3 min read
In this series, we shed a light on the development of a few products of the Objet Portrait project by Roel Vandebeek. How did these products come to life, how long did it take and what were the design hurdles we had to take?
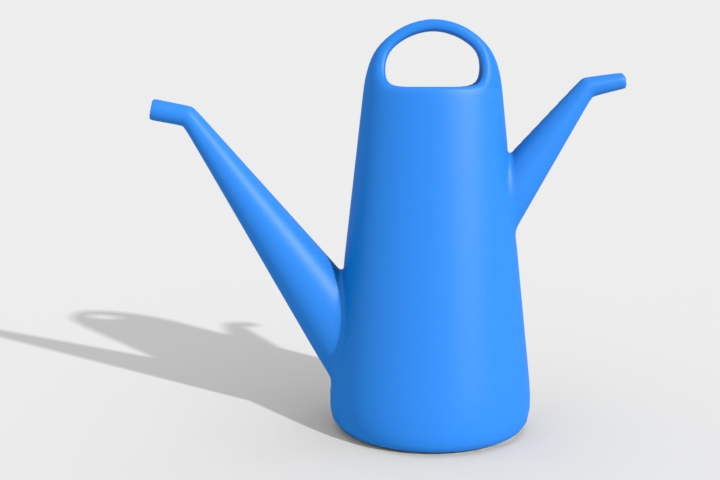
For this post we will dive into a one-of-a-kind watering can: Drip Drop.
This watering can is convenient. Very convenient. It has a large and small watering mouth on opposite sides so it is usable for small plants and accurate watering, while also having a larger opening for rough pouring onto bigger plants or shrubs. It is fairly big (up to 8 liter), so it could be heavy when full, so both nozzles double up as extra grips to aid with tilting when pouring.
Usually Roel enters the office with pages full of new designs. On them, a lot of different sketches: different takes on several numerous concepts. We usually go through them and eliminate the lesser designs until one or two fantastic ideas are left on the table.
Not so this time: only one page was presented: on it, a single design was circled. This is the one. "See what you can make of it, we have to present this design by the end of the week."

So, after a few rounds of 3D modelling, the design was discussed in detail.
I used Modo801 and MeshFusion to constantly and interactively change the design while discussing the overall shape: how is the flow the of the handle? What is its volume? How does it look from several angles? Does the shape of the footprint work?


Most of the time, 3D models present some problems you simply don not see or encounter in a fast sketch. When the product is in its concept phase though, it sometimes does not matter: practicality does not need to be solved just yet, but you should always keep an eye on it. Eventually we will want this thing to be out in the real world.

The above picture is a 3D print of design 04. This one was printed out at 1/10th the size of the intended scale. It is hollow on the inside so we could try it out with water.
Having this one thoroughly tested, we adjusted the overall shape, the roundness and size of the watering can. Also, the end of the big nozzle needed to be moved a little bit upwards, otherwise water would leak out.
After a few more revisits, we enlarged the can to hold up to 8 litre. But enlarging the water container meant the ratio of the watering can was skewed. It just did not look the part anymore, which meant shifting the nozzles and handle around, scaling them appropriately and repositioning them.
In the picture below, you can see the difference between the old can (black wireframe) and the new one. Aside from the change in size, you can also see the handle on top changed and the position of the nozzles shifted. The scale of each nozzle, which was deemed perfect, remained the same.

The last stage in the process was to prepare the 3D model for plastic mould fabrication, where you need a mould as a negative of the final product and where they cut out the necessary holes afterwards.
A final 3D model had to be made, with slightly extended nozzles, and a closed hole at the top.

Production can begin! Shortly after giving the green light, Drip Drop was produced in 5 different colours. From start to finish, the whole process took about 2 years, of which only a month was put into this product alone.
Buy a Drip Drop at https://www.itsaroel.be/product/dripdrop/.


___________
In this series, we shed a light on the development of a few products of the Objet Portrait project by Roel Vandebeek. How did these products come to life, how long did it take and what were the design hurdles we had to take?
Next up: Charging Station


Comments